Review Deploy
Let’s review what has been deployed.
CloudFormation Console
Jets leverages CloudFormation for deployment, so check the CloudFormation console. You should see something like this:
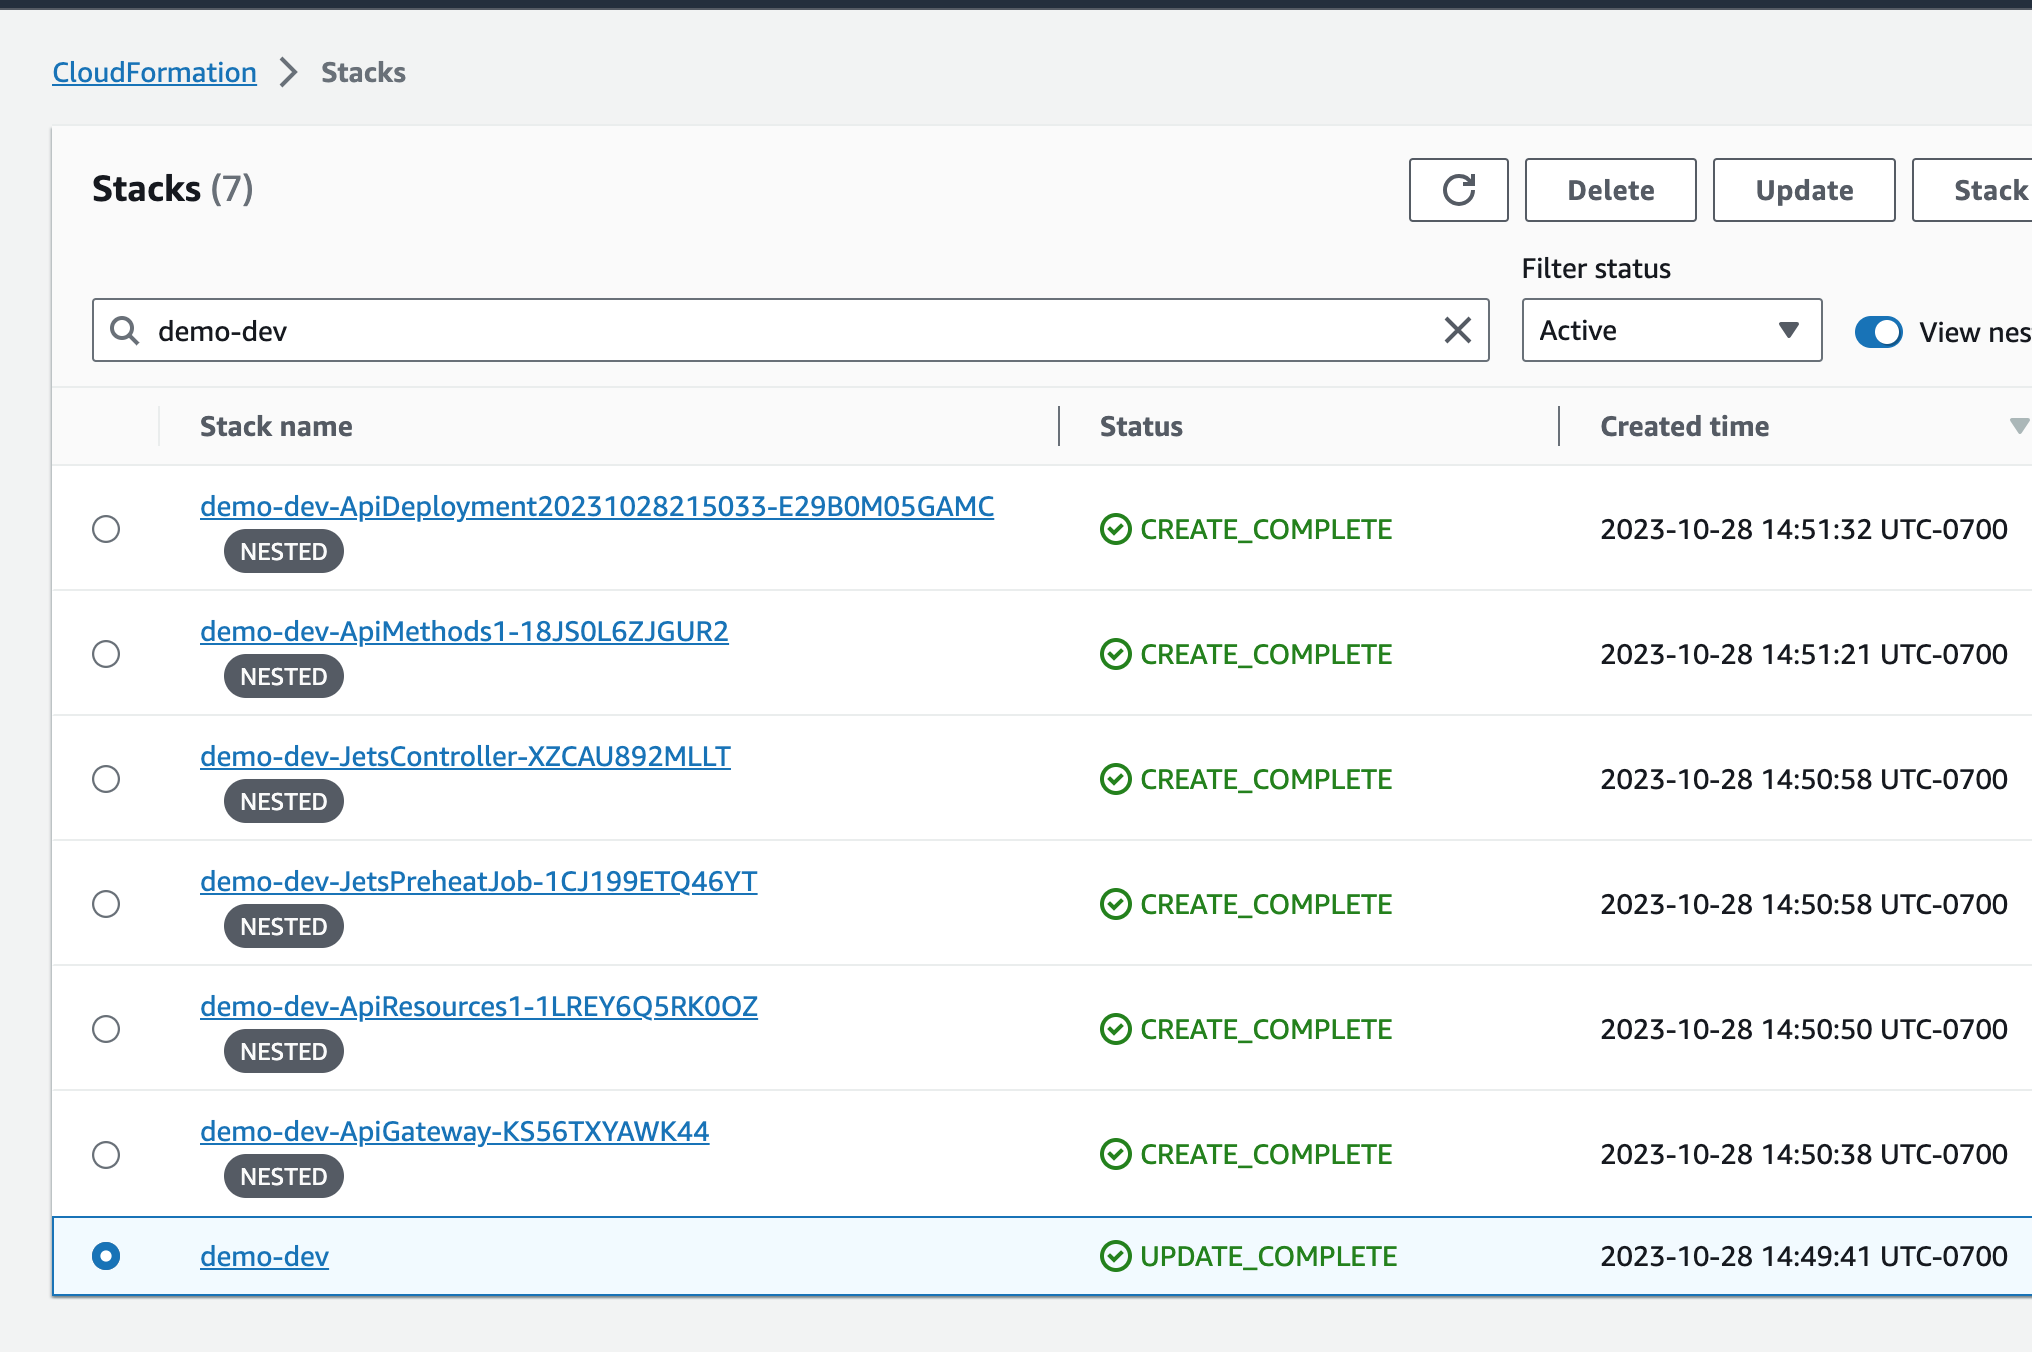
Jets creates a main parent demo-dev stack that, in turn, creates a few nested CloudFormation stacks. This solves the CloudFormation quotas and limits. Here’s a summary:
- There are few stacks that manage the API Gateway resources. They start with
demo-dev-Api* - There is a stack that manages a PreheatJob, it starts with
demo-dev-JetsPreheatJob-* - There is a stack that manages the controller, it starts with
demo-dev-JetsController-*.
API Gateway REST API
If you look at the CloudFormation stack demo-dev-ApiGateway-* Resources tab, you’ll see the Rest API.
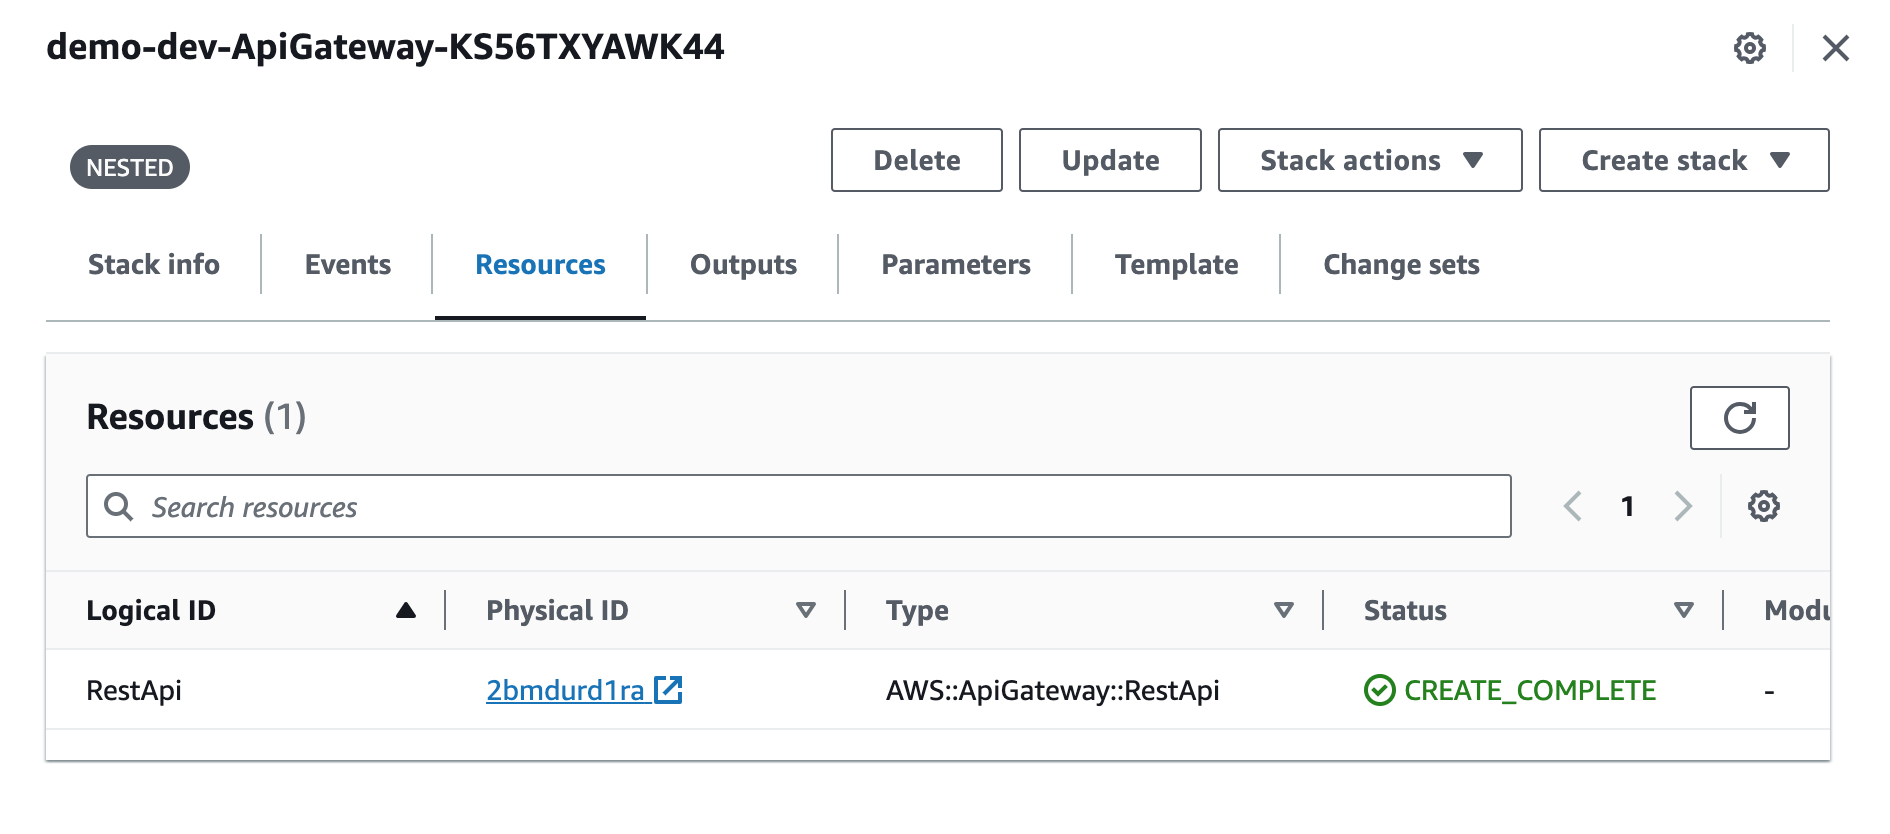
Clicking on the Physical ID link takes you to the APIGW console. You can see that that points to a demo-dev-controller Lambda function.

Lambda Console
The demo-dev-controller Lambda function is defined in the demo-dev-JetsController-* CloudFormation stack.
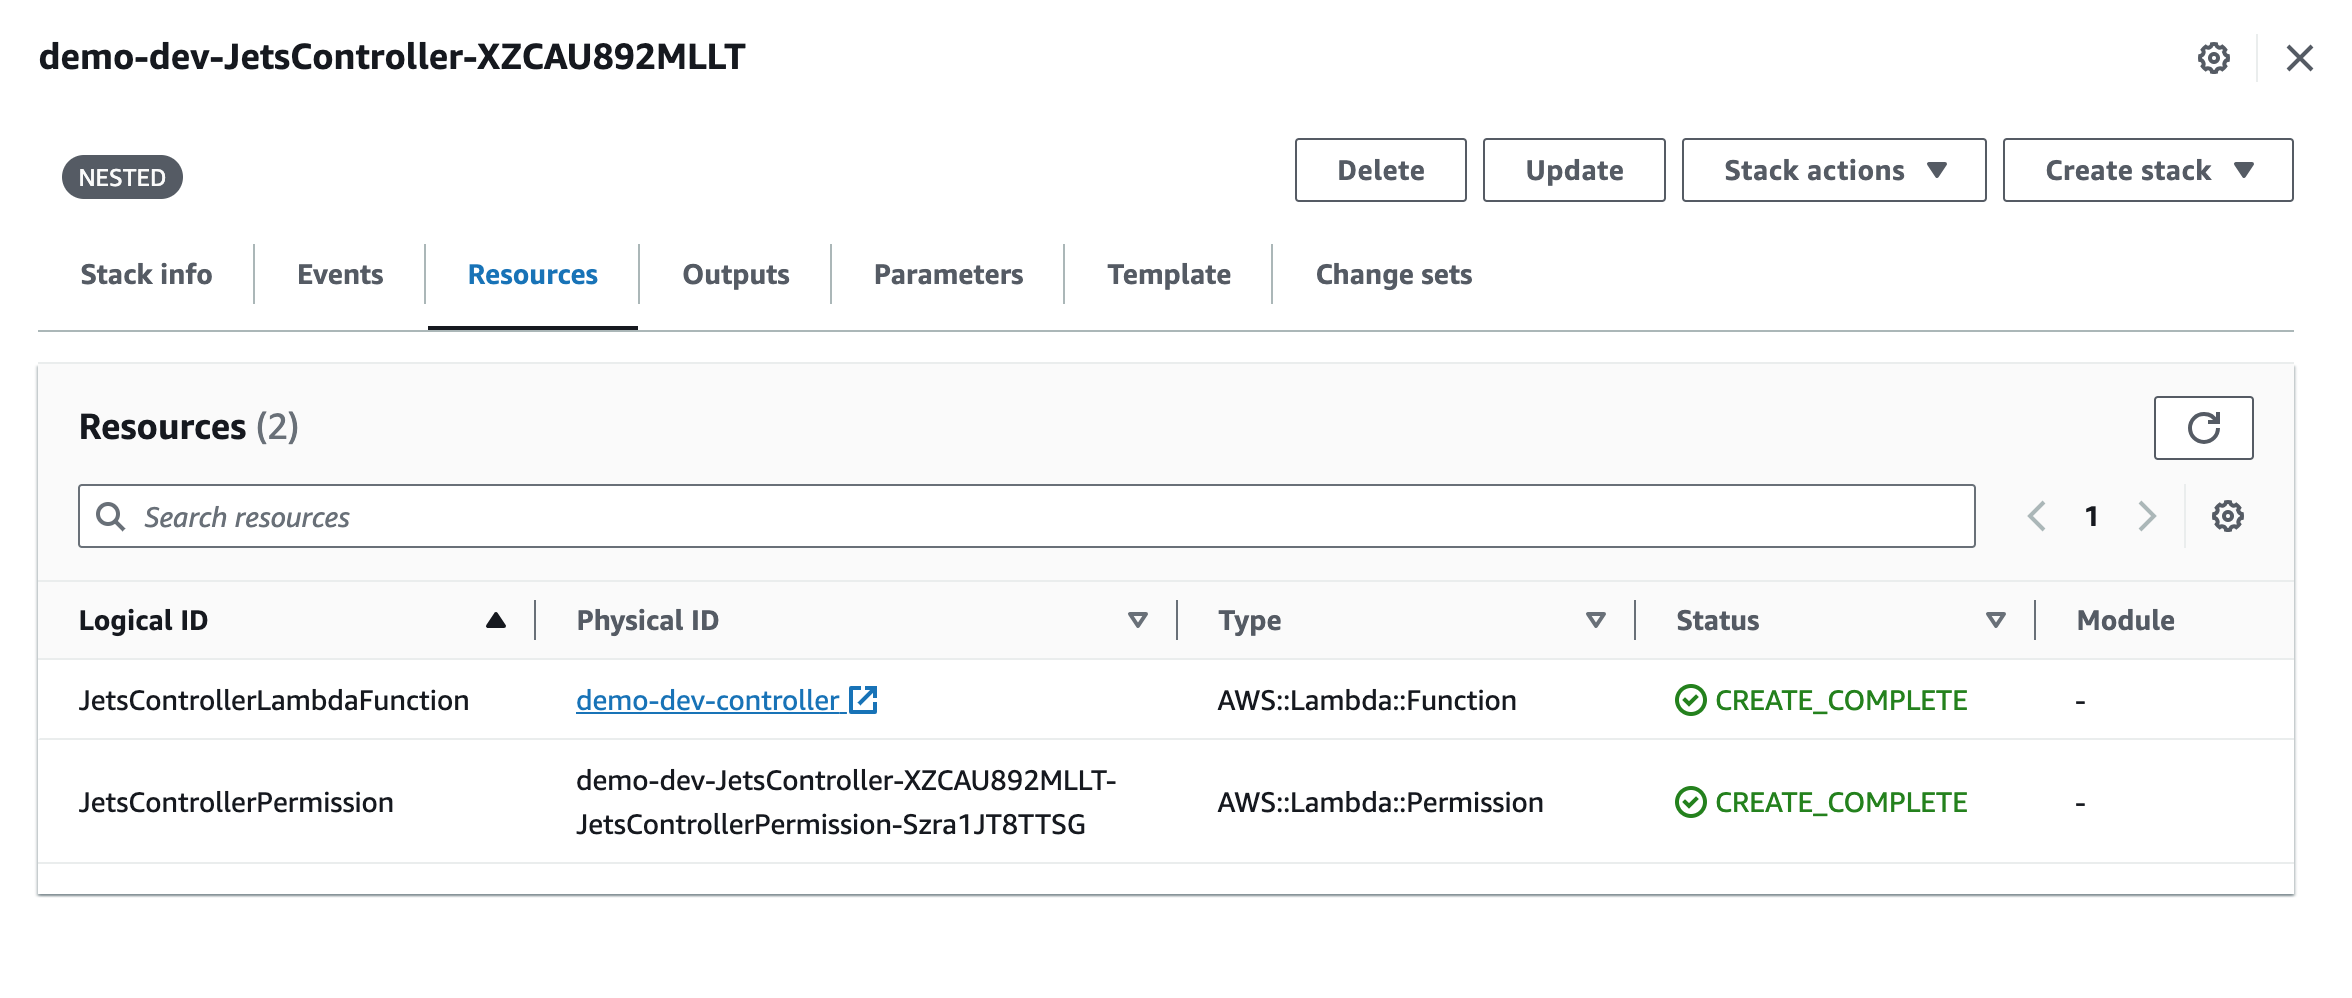
Clicking on the Physical ID link takes you to the Lambda console. You can see the Lambda handler code there.
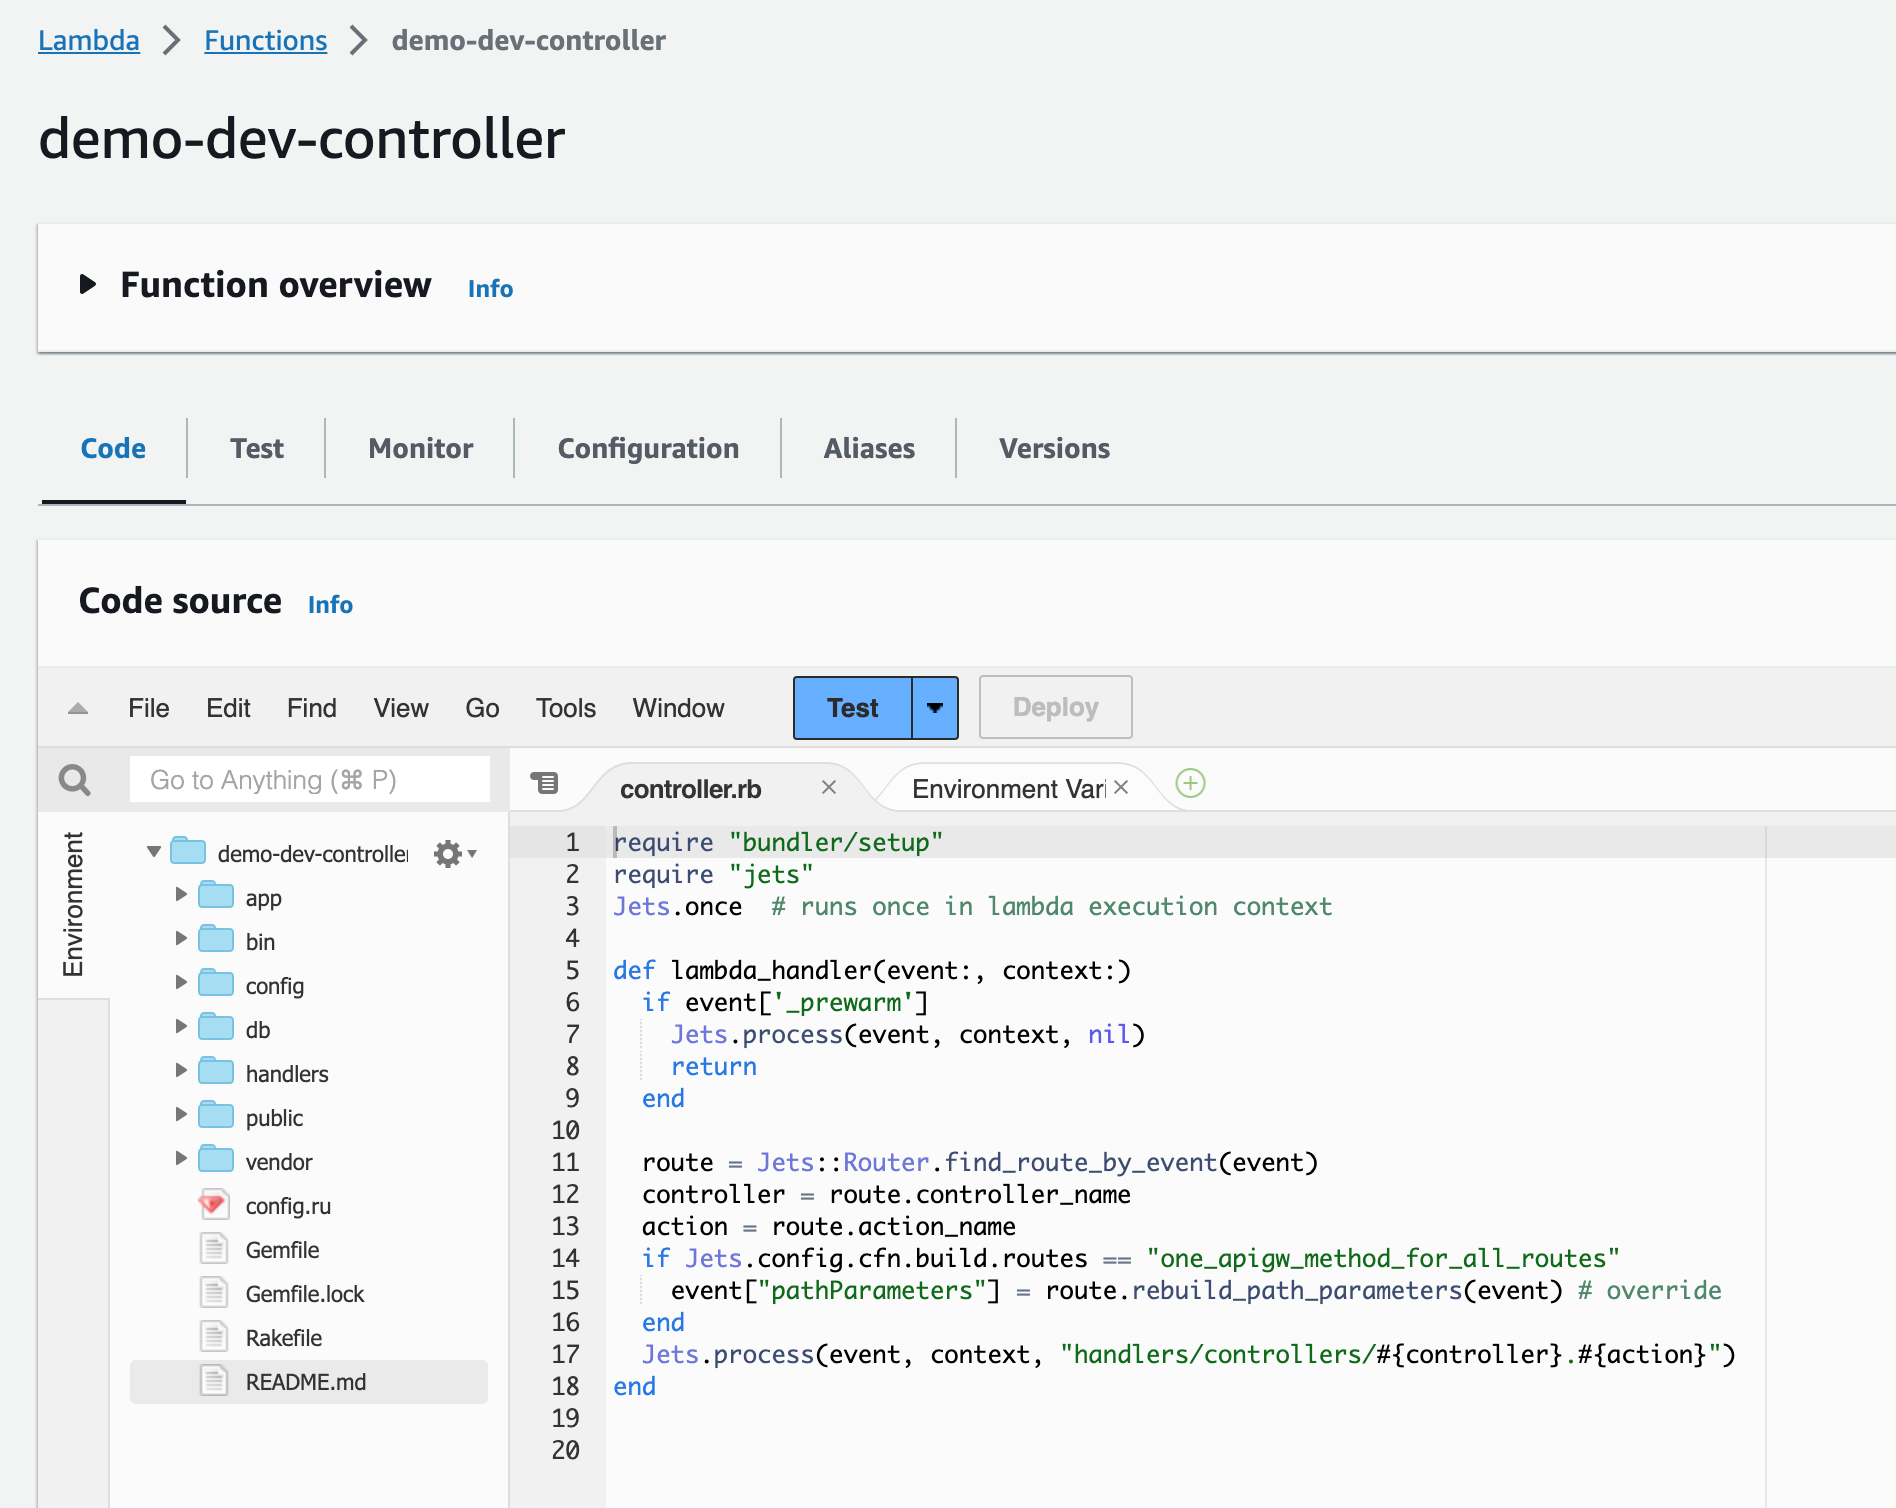
The Lambda function handler is generated as part of jets deploy. The handler is the “point of entry” for Lambda and provides the interface that Lambda expects. The code routes the request to the desired controller action.
The Jets.process ultimately calls the PostsController action methods. You can open app/controllers/posts_controller.rb and see the code we created earlier.
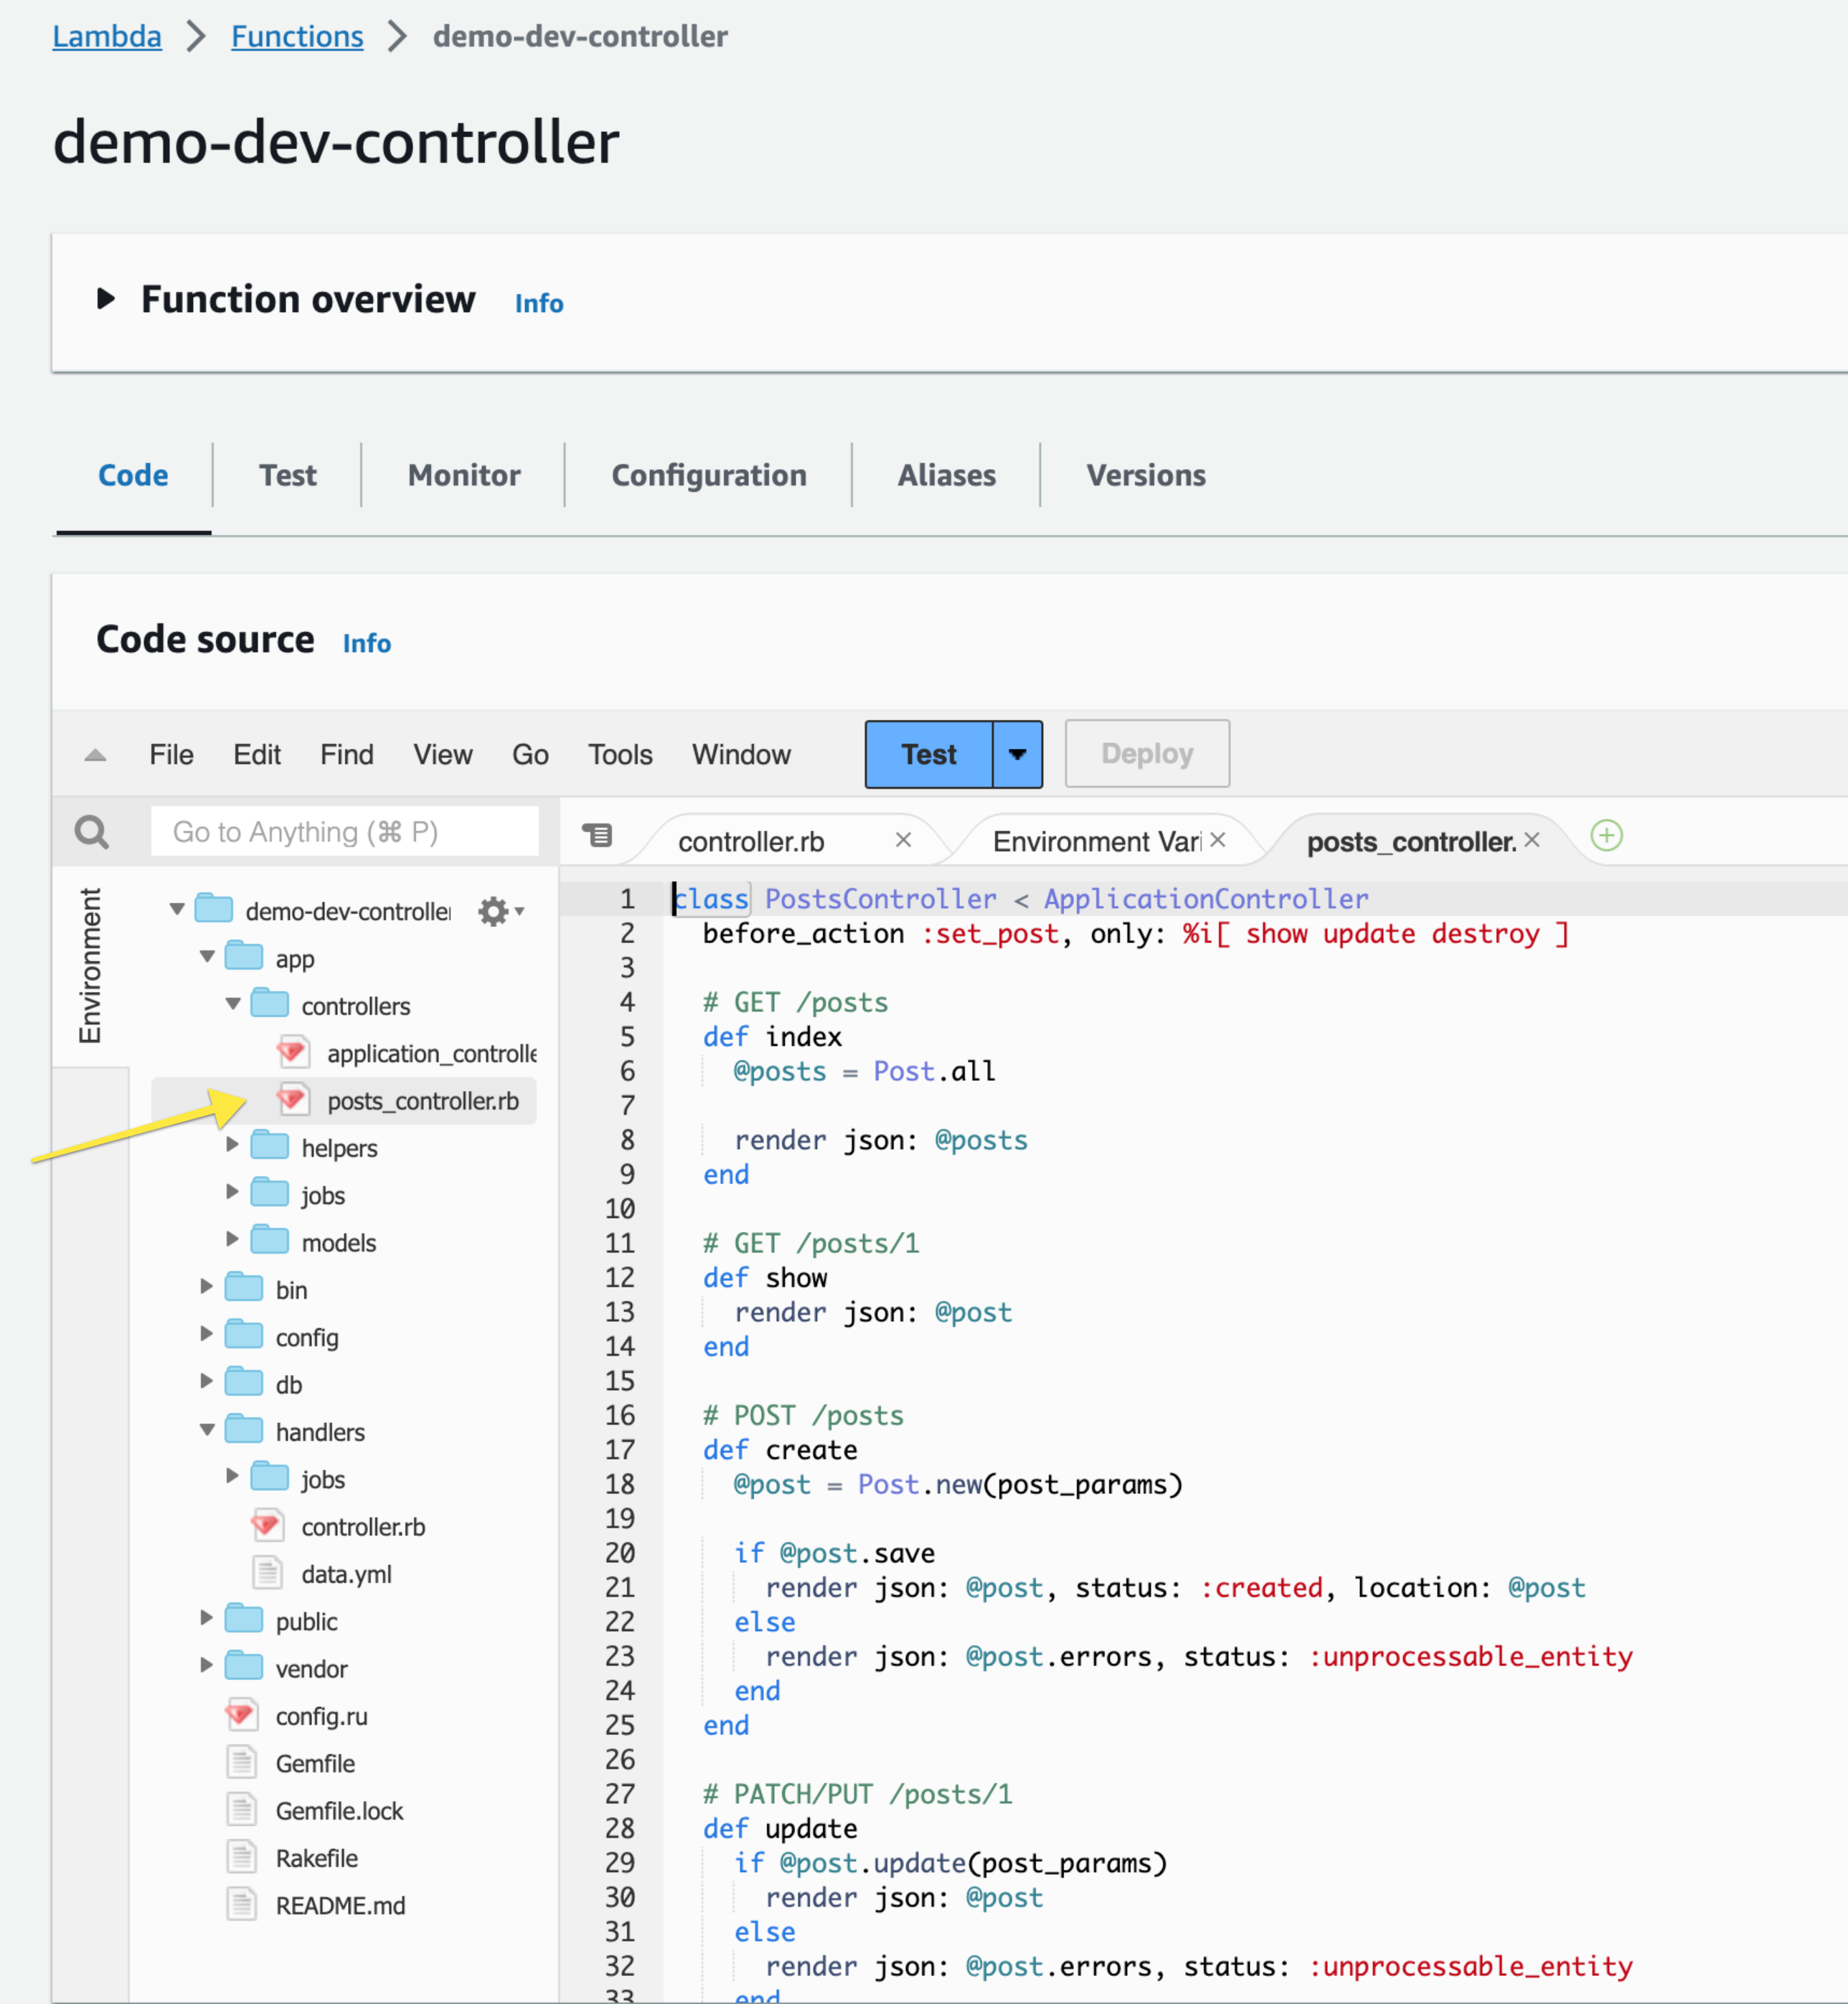
Note: Jets v5 creates one APIGW Method and Lambda function for all controller actions. Previous versions of Jets created multiple resources. There are some pretty significant advantages with the Jets v5 approach.
Test Lambda Function
Let’s test the Lambda function manually with the Lambda Console built-in Test functionality. For the event, you need a payload that mimics what the APIGW service would send to the Lambda function. Here’s a minimal example:
{
  "path": "/posts",
  "httpMethod": "GET",
  "headers": {
    "Host": "foobar.execute-api.us-west-2.amazonaws.com"
  }
}
After you click Test, you’ll see a “Executing function: succeeded” message with a link to the logs.
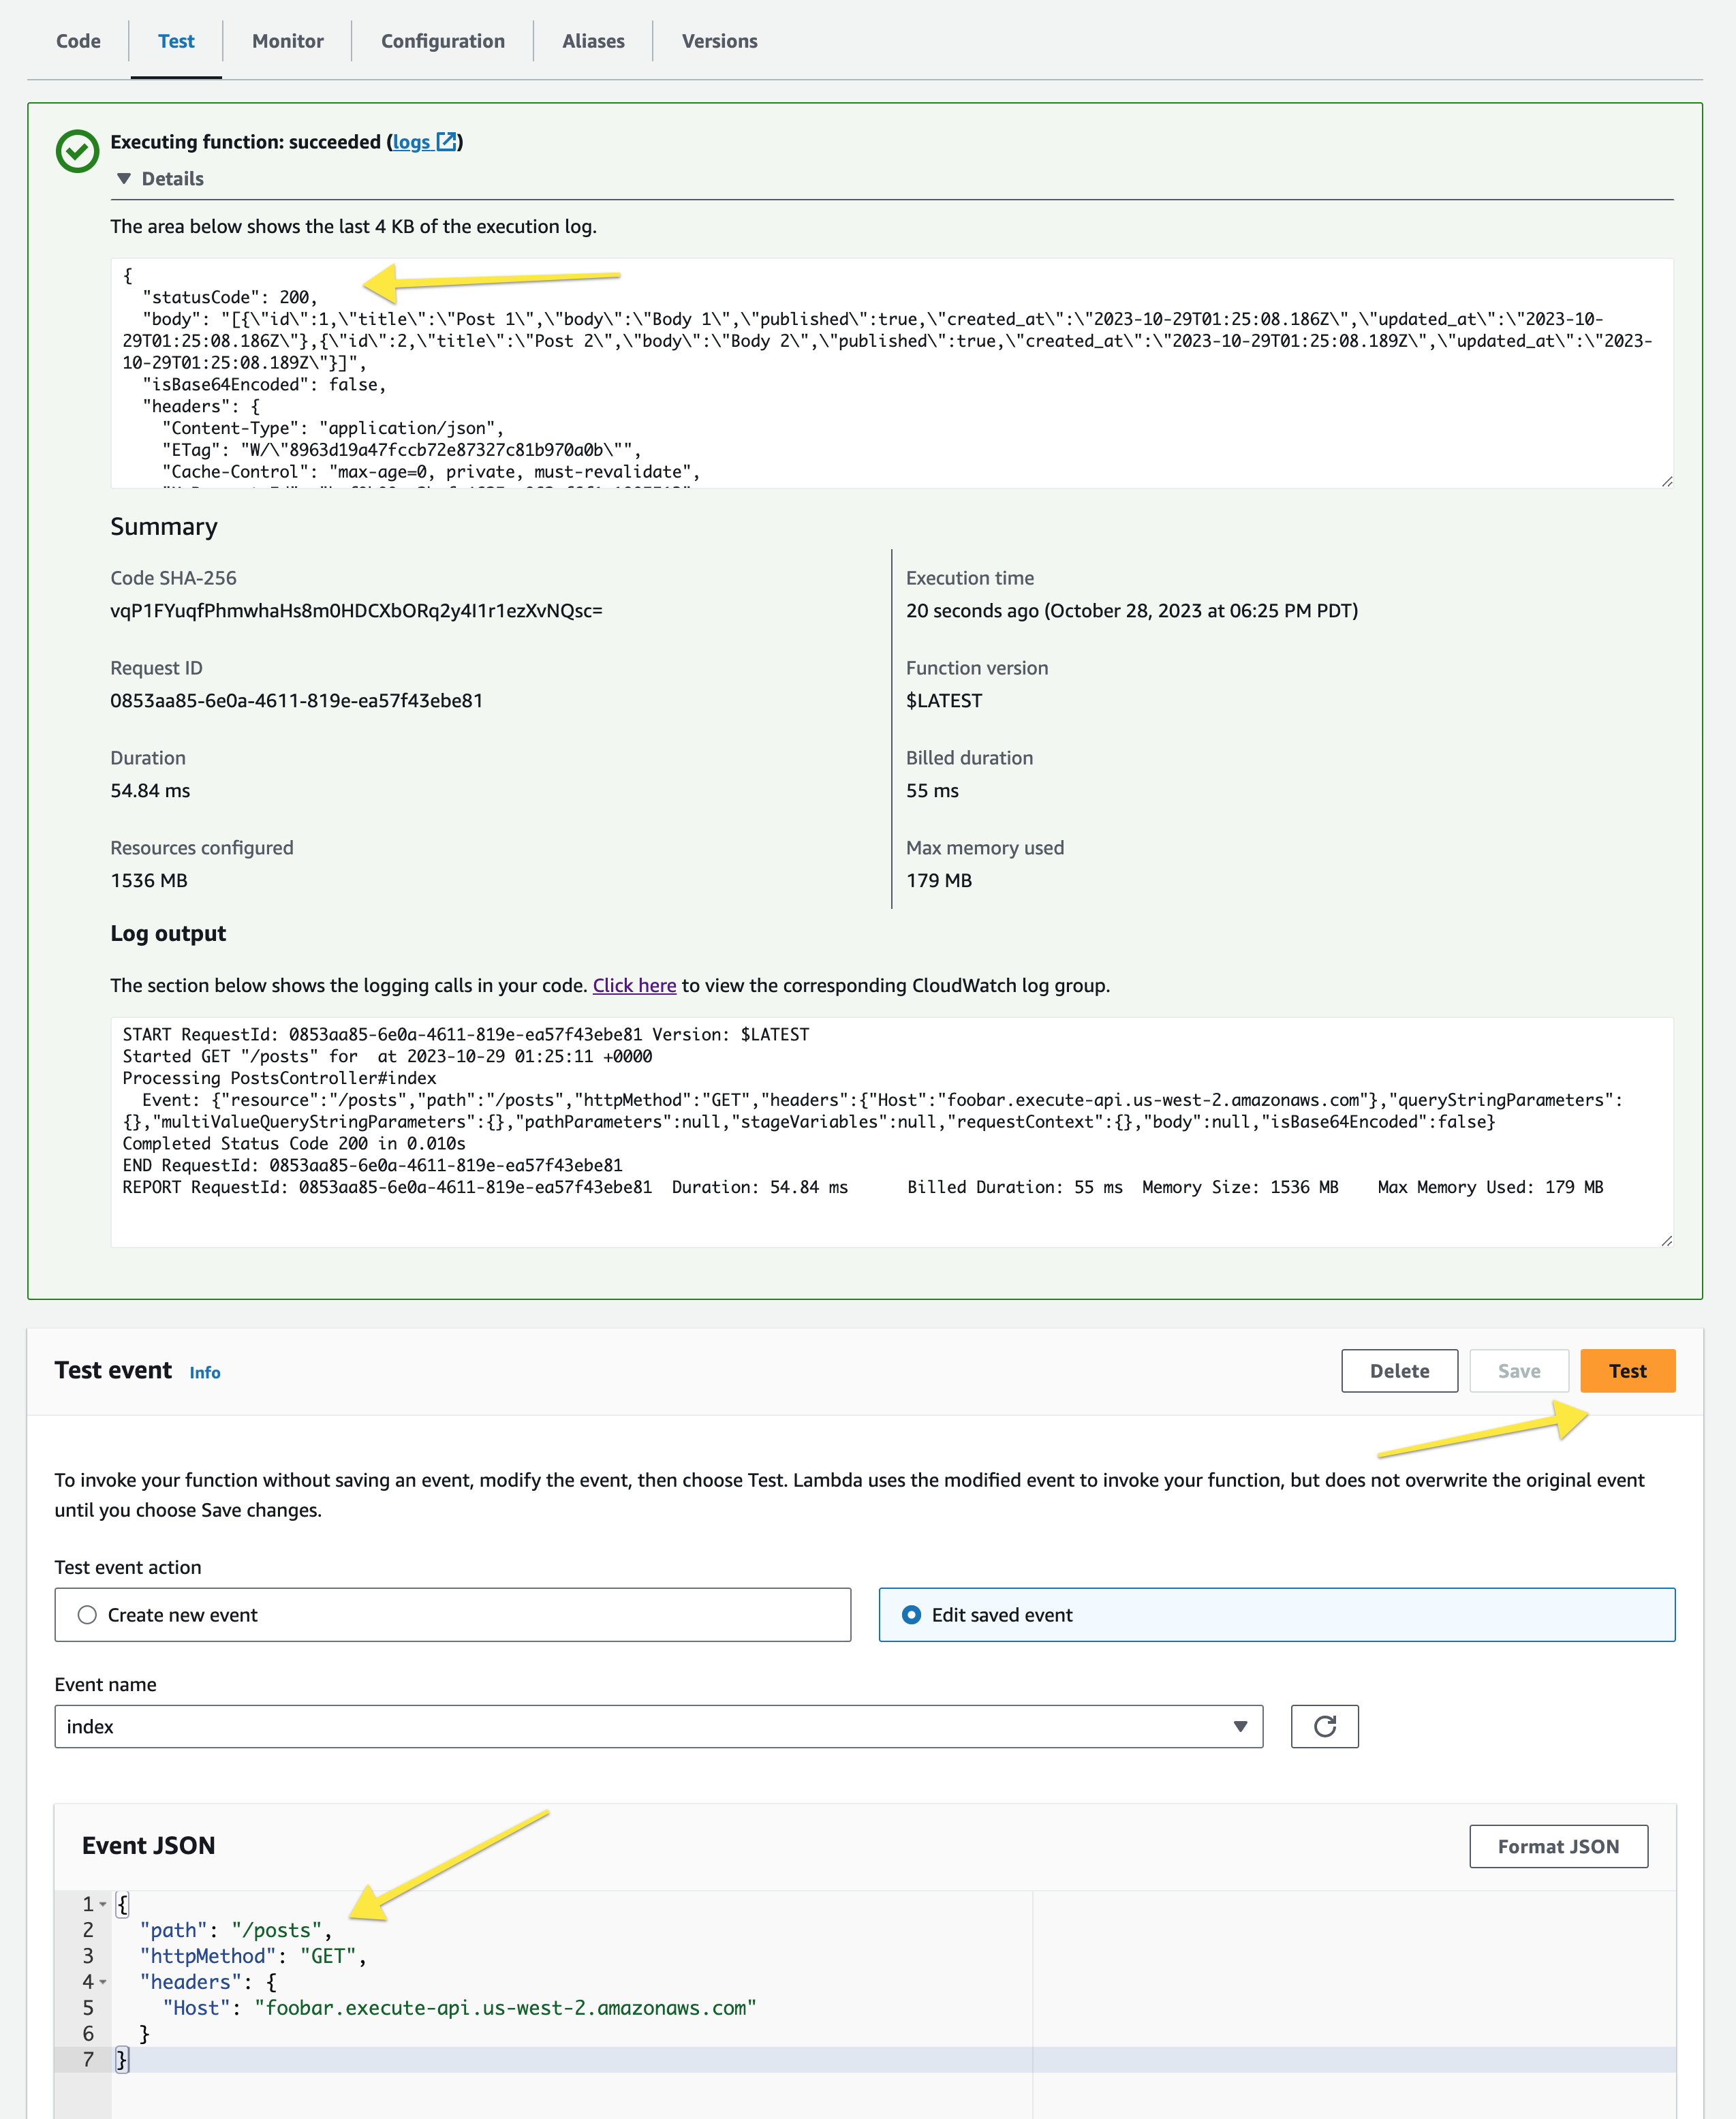
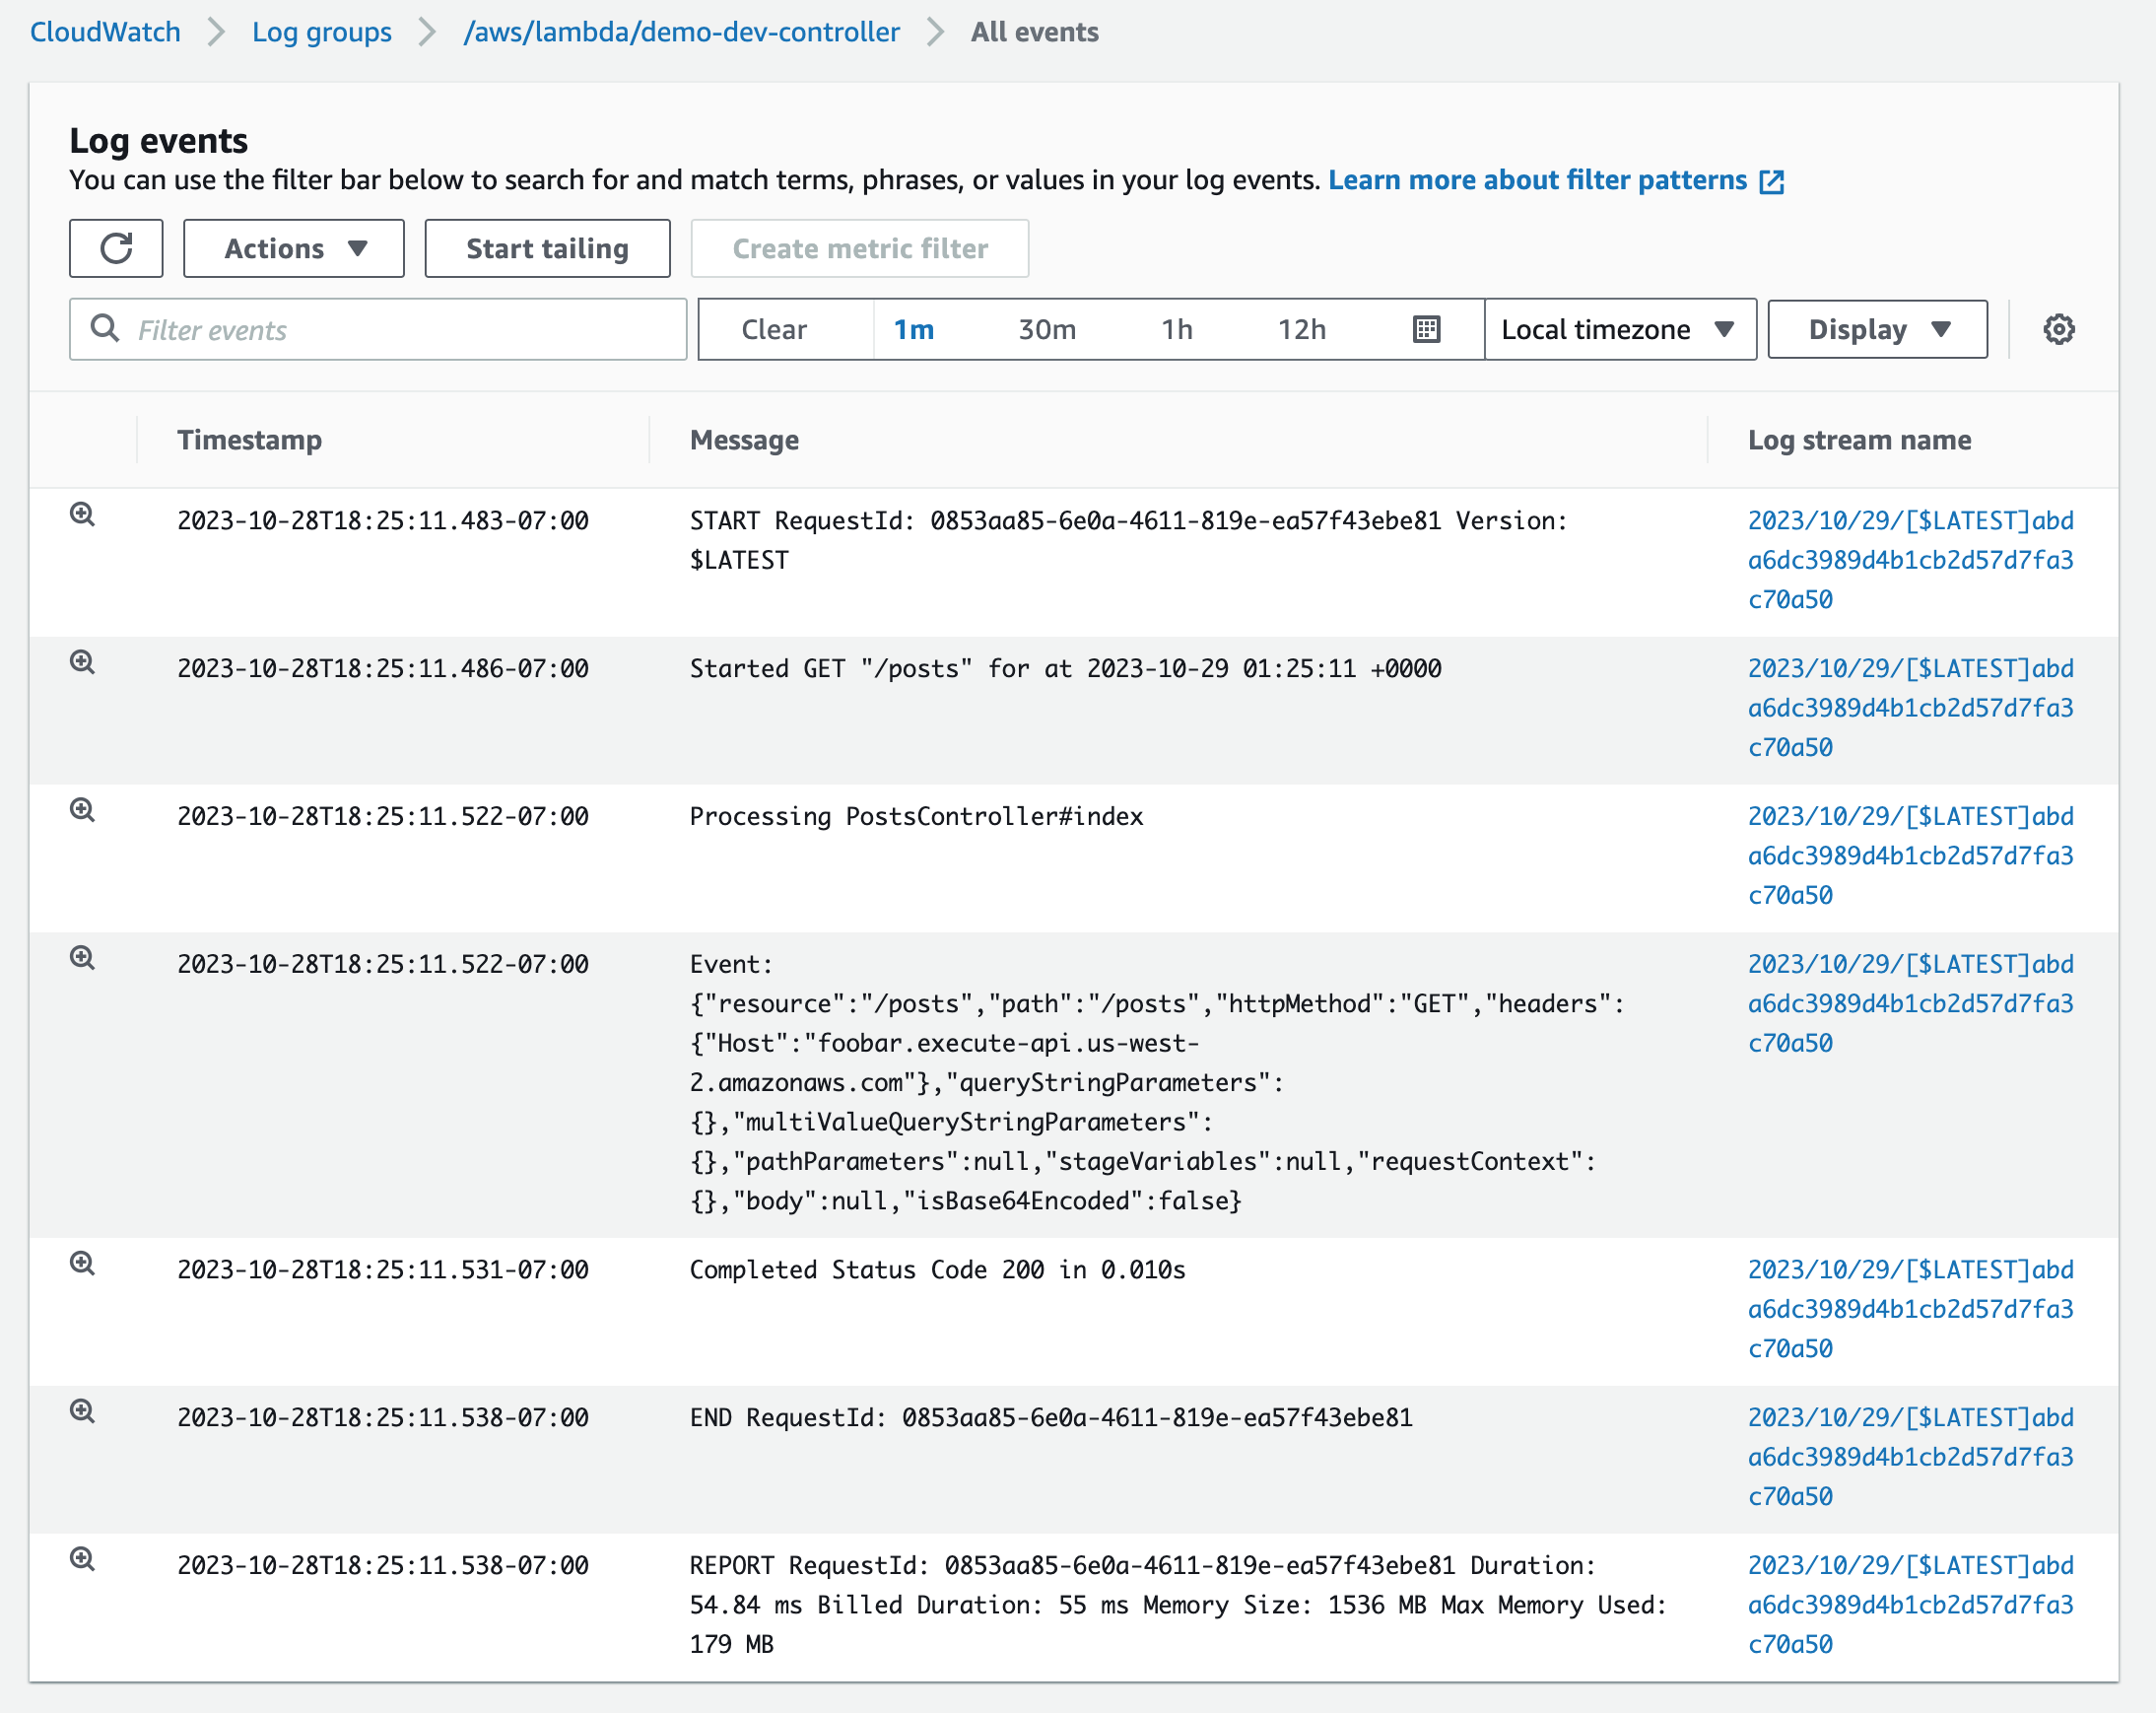
Clicking on the logs link takes you to the CloudWatch Logs Console. It shows all the Log Streams for the Log Group for the Lambda Function. Clicking Search Log Group and filtering by 1m or 30m is an easy way to see the logs.
Testing with the Lambda console is a bit of a pain because we need to figure out the event payload structure. See Debug Event Payloads for more example payloads. We’ll test with curl next.
Testing with Curl
It’s more traditional to test with curl. We’ll go through a few examples.
To get the APIGW endpoint, you can use the jets url command.
❯ jets url
API Gateway Endpoint: https://2bmdurd1ra.execute-api.us-west-2.amazonaws.com/dev
Grab that value and store it in a variable
❯ export URL=https://2bmdurd1ra.execute-api.us-west-2.amazonaws.com/dev
Tip: You can also grab the url with this export URL=$(jets url --format json | jq -r '.api_gateway_endpoint')
We can now curl like so:
❯ curl -s $URL/posts | jq
[
  {
    "id": 1,
    "title": "Post 1",
    "body": "Body 1",
    "published": true
  },
  {
    "id": 2,
    "title": "Post 2",
    "body": "Body 2",
    "published": true
  }
]
Note, the timestamps have been removed from the shown output for conciseness.
Curl Commands Cheatsheet
We can use the similar commands we used earlier with Local Testing. Here’s an example data.json we can use:
data.json
{
  "post": {
    "title": "Post 3",
    "body": "Body 3",
    "published": true
  }
}
Here’s a cheatsheet of curl commands.
curl $URL/posts                             # posts#index
curl -X POST --data @data.json $URL/posts   # posts#create
curl -X PUT --data @data.json $URL/posts/3  # posts#update
curl -X DELETE $URL/posts/3                 # posts#destroy
Next, we’ll make some updates and do more testing.